Hello!
Thank you for clarifying.
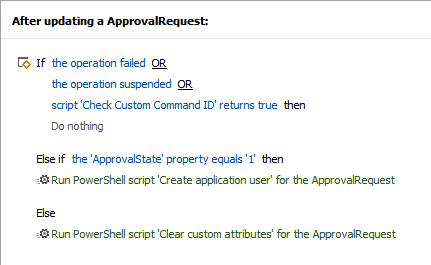
To achieve the desired a Custom Command and a Business Rule triggering After updating an ApprovalRequest can be used. The script that creates user accounts will be executed in the Business Rule, not in the Custom Command. This way the required approval request will be the target object of the rule and there will be no need to search the request. The Custom Command will be configured to save values of the parameters to custom text attributes of the user on which the command is executed and then submit the approval request. If the request is approved, the script in the Business Rule will check whether the approve reason is specified and if it is, overwrite the value of the access level parameter with the value of the approve reason. If the request is denied or canceled, the custom attribute values will be cleared using a PowerShell script.
i. Creating the Custom Command
- Launch Adaxes Administration Console.
- In the Console Tree, right-click your service node.
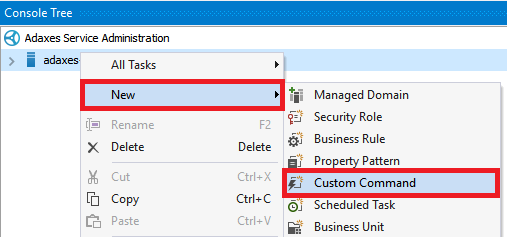
- In the context menu, navigate to New and click Custom Command.
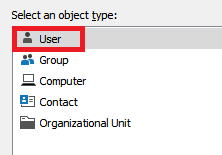
- On step 2 of the Create Custom Command wizard, select the User object type.
- Click Next.
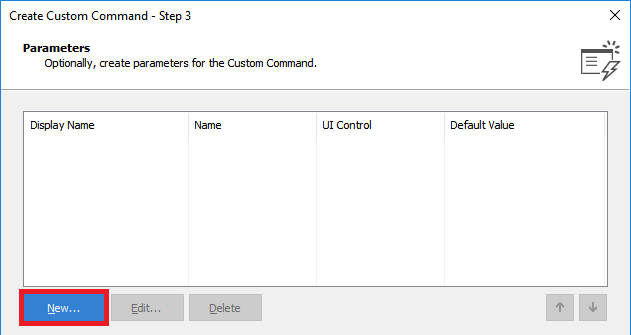
- Click New.
- Select Edit box and click Next.
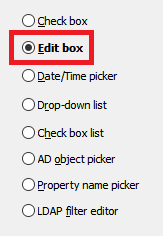
- Specify a parameter name and display name (e.g. Username and User name).

- Click Next and finish creating the parameter.
- Click New again.
- Select Edit box and click Next.
- Specify a parameter name and display name (e.g. Accesslevel and Access level).
- Click Next and finish creating the parameter.
- Click Next.
- Click Add an action.
- Select Update the user.
- Click Add.
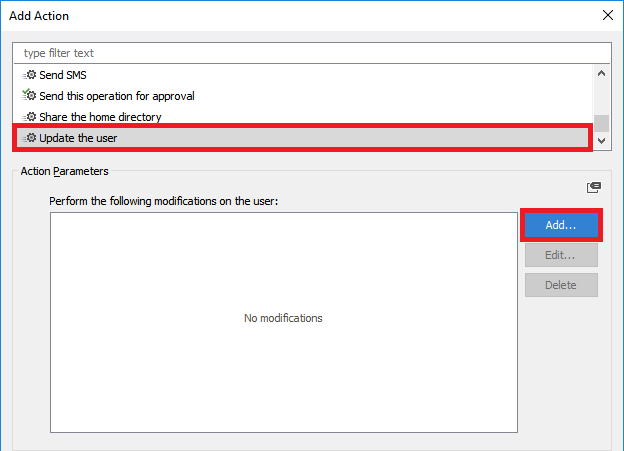
- In the Property to modify drop-down, select the custom text attribute (e.g. CustomAttributeText1) that will be used to store the value of the parameter created on steps 6-9 and used to specify the user name.
- In the New value field, specify the value reference containing the name of the parameter created on steps 6-9 with the param- prefix (e.g. %param-Username%).
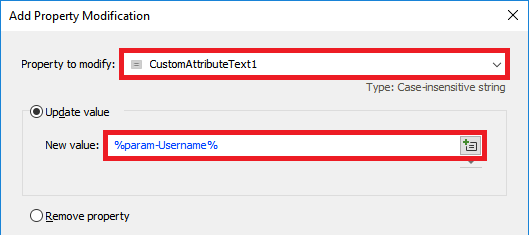
- Click OK.
- Click Add again.
- In the Property to modify drop-down, select the custom text attribute (e.g. CustomAttributeText2) that will be used to store the value of the parameter created on steps 10-13 and used to specify the access level.
- In the New value field, specify the value reference containing the name of the parameter created on steps 10-13 with the param- prefix (e.g. %param-Accesslevel%).
- Click OK.
- Finally, the configuration of the action should look like the following:
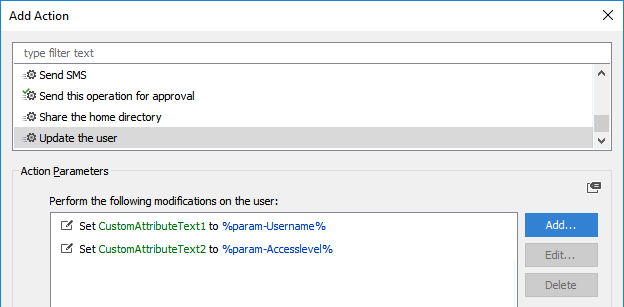
- Click OK.
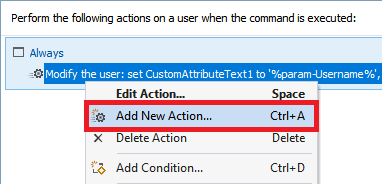
- Right-click the created action and then click Add New Action.
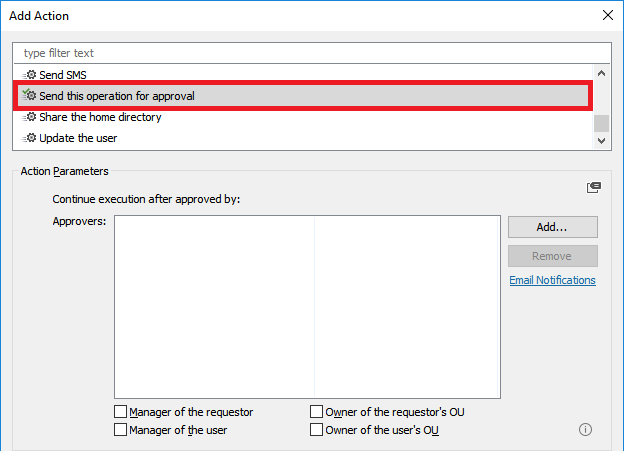
- Select Send this operation for approval.
- Specify the required approvers and click OK.
- Click Next and finish creating the Custom Command.
- Finally, the command configuration should look like the following:

ii. Creating the Business Rule
- Launch Adaxes Administration Console.
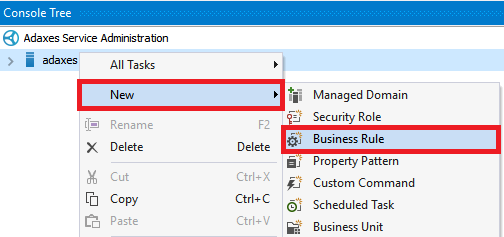
- In the Console Tree, right-click your service node.
- In the context menu, navigate to New and click Business Rule.
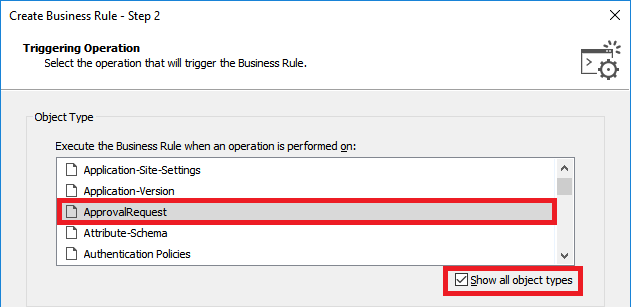
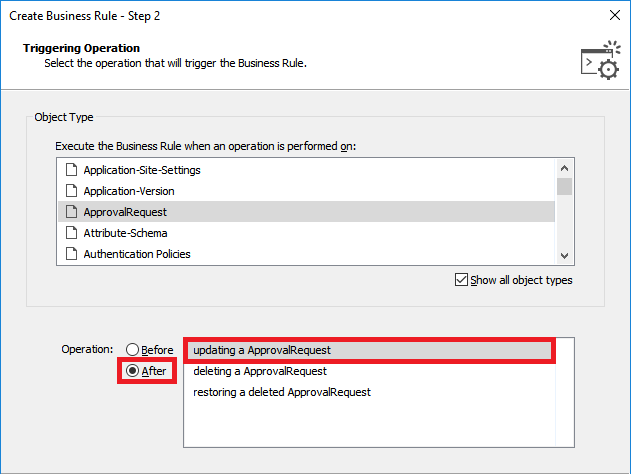
- On step 2 of the Create Business Rule wizard, select the Show all object types checkbox.
- Select the ApprovalRequest object type.
- Select After updating a ApprovalRequest.
- Click Next.
- Click Add an action.
- Click OK without selecting any actions.
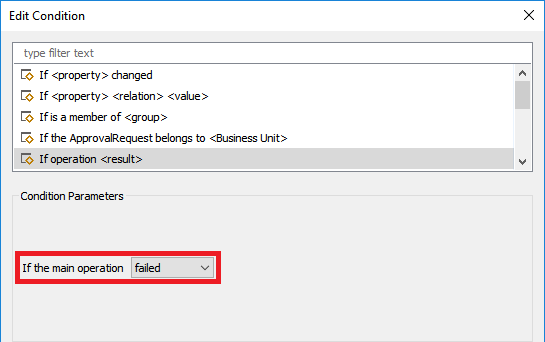
- Right-click the If the operation succeeded condition and then click Edit Condition.

- Select If the main operation failed and then click OK.
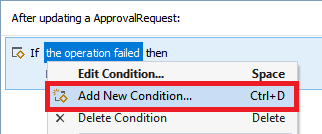
- Right-click the modified condition and then click Add New Condition.
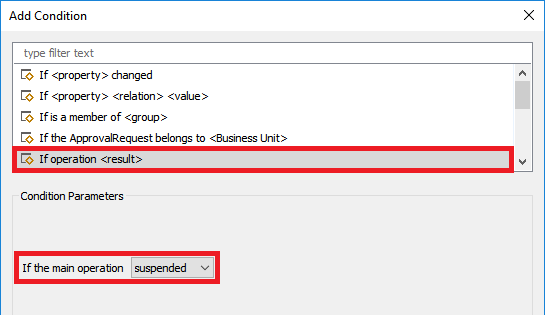
- Select If operation \.
- Select If the main operation suspended.
- Click OK.
- Right-click the created condition and then click Add New Condition.
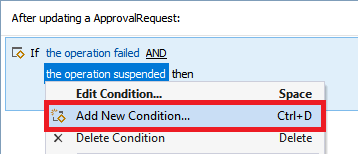
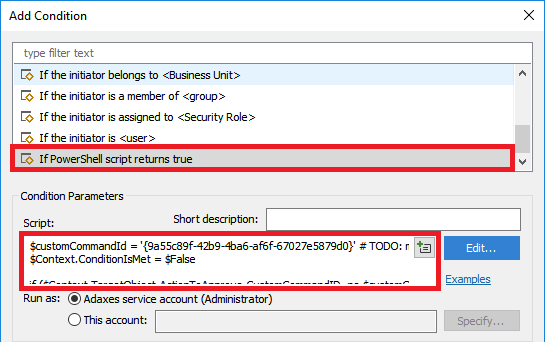
- Select If PowerShell script returns true.
- Paste the below script into the Script field. In the script, the $customCommandId variable specifies the ID of the Custom Command created in section i. For information on how to get the ID, see http://adaxes.com/sdk/HowDoI.GetCustomCommandID.
$customCommandId = '{9a55c89f-42b9-4ba6-af6f-67027e5879d0}' # TODO: modify me
$Context.ConditionIsMet = $False

if ($Context.TargetObject.ActionToApprove.CustomCommandID -ne $customCommandId)
{
    $Context.ConditionIsMet = $True
}
- Specify a description for the script and click OK.
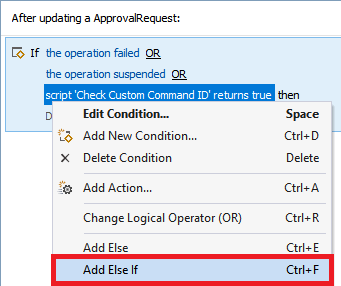
- Click the AND logical operator to change it to OR.

- Right-click the created condition and then click Add Else If.
- In the created Else If block, right-click \ and then click Add Condition.
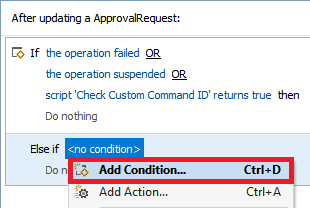
- Select If \ \ \.
- Select If ApprovalState equals 1.
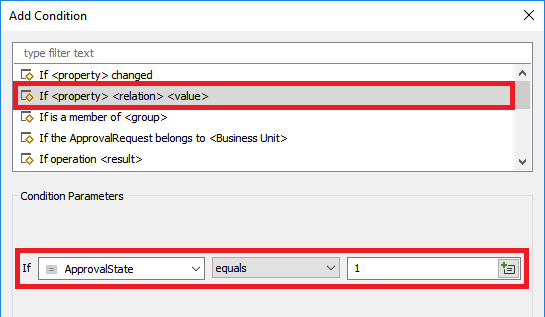
- Right-click Do nothing and then click Add Action.
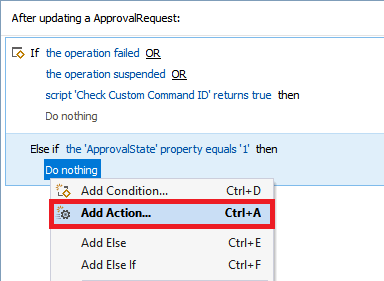
- Select Run a program or PowerShell script.
- Modify the below script to meet your needs and then paste it into the Script field. In the script:
- $usernameAttributeName - Specifies the LDAP name of the custom text attribute you specified in section i on step 18.
- $accessLevelAttributeName - Specifies the LDAP name of the custom text attribute you specified in section i on step 22.
$usernameAttributeName = "adm-CustomAttributeText1" # TODO: modify me
$accessLevelAttributeName = "adm-CustomAttributeText2" # TODO: modify me

# Get the approval request target user
$user = $Context.TargetObject.TargetObject

# Get the custom attribute values
try
{
    $username = $user.Get($usernameAttributeName)
    $accessLevel = $user.Get($accessLevelAttributeName)
}
catch
{
    $Context.LogMessage("Failed to get attribute values", "Error")
    return
}

# Get approve reason
$reason = $Context.TargetObject.ApprovingReason

if (-not ([System.String]::IsNullOrEmpty($reason)))
{
    # Replace access level with approve reason
    $accessLevel = $reason
}

# Provide the rest of your script here.
# The $username variable contains the value of the username specified in the Custom Command parameter.
# The $accessLevel variable contains the value of the access level specified in the Custom Command parameter. If the approve reason is specified, the $accessLevel variable contains the value of the approve reason.

# Clear custom attributes
$user.Put($usernameAttributeName, $NULL)
$user.Put($accessLevelAttributeName, $NULL)
$user.SetInfo()
- Provide a description for the script and click OK.
- Right-click the created action and then click Add Else.
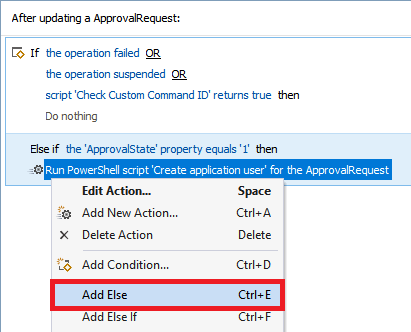
- Right-click Do nothing and then click Add Action.
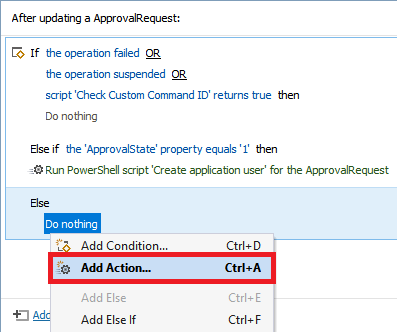
- Select Run a program or PowerShell script.
- Paste the below script into the Script filed. In the script:
- $usernameAttributeName - Specifies the LDAP name of the custom text attribute you specified in section i on step 18.
- $accessLevelAttributeName - Specifies the LDAP name of the custom text attribute you specified in section i on step 22.
$usernameAttributeName = "adm-CustomAttributeText1" # TODO: modify me
$accessLevelAttributeName = "adm-CustomAttributeText2" # TODO: modify me

# Get the approval request target user
$user = $Context.TargetObject.TargetObject

# Clear custom attributes
$user.Put($usernameAttributeName, $NULL)
$user.Put($accessLevelAttributeName, $NULL)
$user.SetInfo()
- Specify a description for the script and click OK.
- Click Next and finish creating the Business Rule.
- Finally, the rule should look like the following:
