Hello,
It is possible to implement something like that. For this purpose, you need to create a Modify Group action with a customized form. On the form, there will be a field where users can specify a reason why they want to join a group. The reason will be assigned to one of the virtual group properties, for example, CustomAttributeText1. Such virtual properties are not stored in Active Directory, but you can use them as any other properties of AD objects. Also, the action will automatically modify another virtual property, for example, CustomAttributeText2, and set it to the Distinguished Name (DN) of the user who runs the action.
The 2nd property will be used to launch a Business Rule. The Business Rule will add the user who launched the action (specified via CustomAttributeText2) to the group, and also add the reason (specified via CustomAttributeText1) in one operation. Thus, when your Business Rule that requests approval for adding a member to a group triggers, an approver will get an approval request that will contain both the user who wants to join the group and the reason, why.
To implement such a solution:
I. Create home page action
To allow users to specify a reason why they want to join a group, you need to create a Modify Group Home Page Action as follows:
- Launch the Web Interface Customization tool.
- In the Interface type drop-down list, select the Web Interface you need.
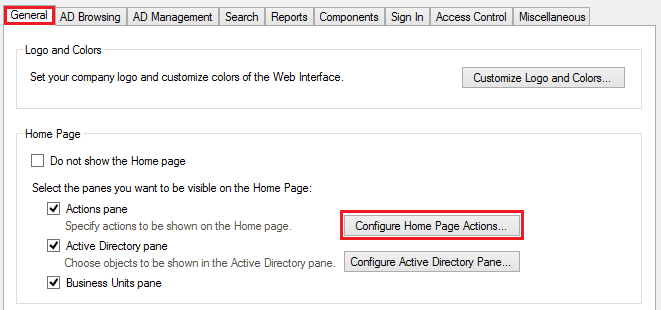
- On the General tab, click Configure Home Page Actions.
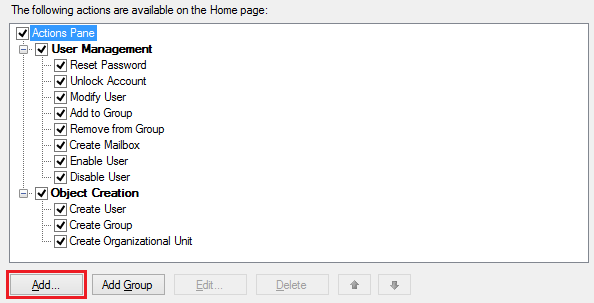
- Click Add.
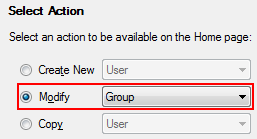
- Select Modify Group. Click Next 3 times.
- On the Form Customization page, select Use customized form.
- Click Customize Form.

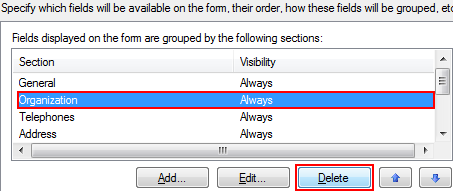
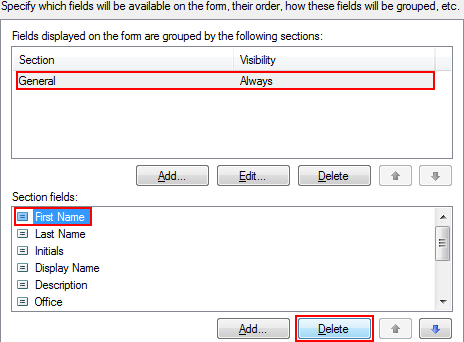
- Leave only the General section in the Fields displayed on the form are grouped by the following sections field. To remove unnecessary sections, select it and click Delete.
- Select the General section.
- In Section fields, remove all fields by selecting each one and clicking Delete.
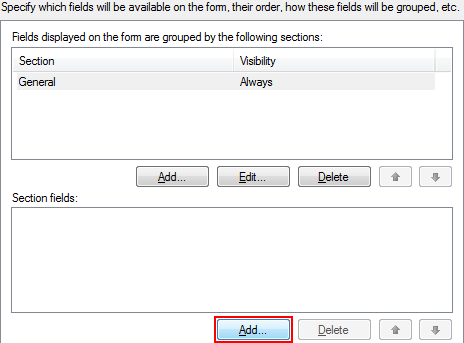
- Click Add.
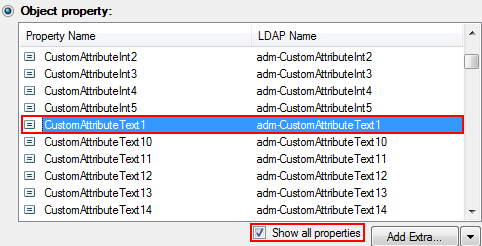
- Select the Show all properties checkbox.
- In the Object property field, select CustomAttributeText1. Click OK twice.
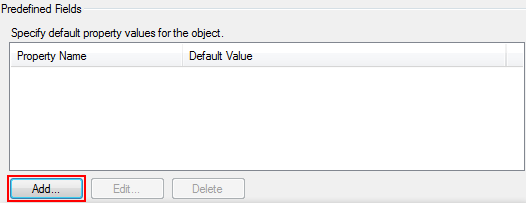
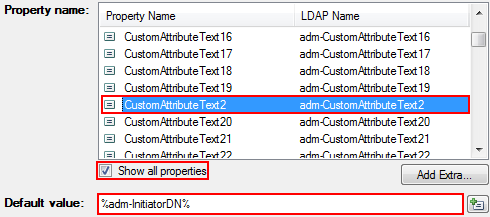
- In the Predefined Fields section of the Form Customization page, click Add.
- In the Property name field, select Show all properties checkbox and CustomAttributeText2.
- In the Default value field, specify %adm-InitiatorDN%. Click OK.
- Finish creating the home page action and apply the changes.
II. Create Business Rule
To create a Business Rule that will add the user who launched the action to the group and specify the reason in one operation:
-
Create a new Business Rule.
-
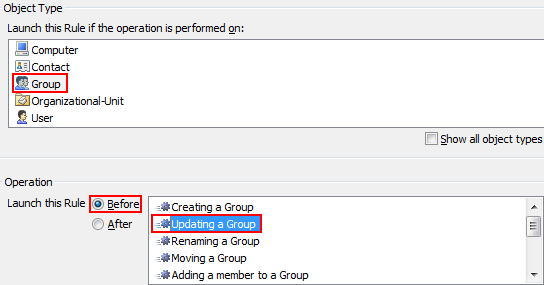
On the Triggering Operation page, select Group and Before Updating a Group. Click Next.
-
Now, you need to add an action that adds the user whose DN is specified in CustomAttributeText2 to the group. To do this, you need to add the user's DN to the Member property of the group. Click Add Action.
-
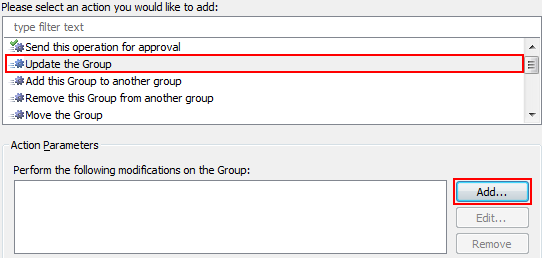
Select Update the Group.
-
In the Action Parameters section, click Add.
-
In the Property to modify drop-down list, select Member.
-
In the New value field, click Edit.

-
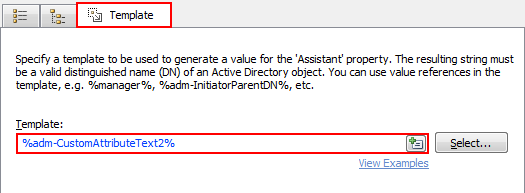
Activate the Template tab.
-
Specify %adm-CustomAttributeText2%.
-
Click OK 2 times.
-
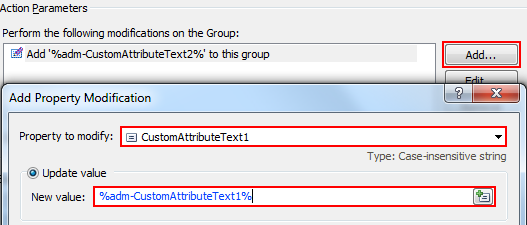
Now, you also need to add the reason. Click Add once more.
-
In the Property to modify drop-down list, select CustomAttributeText1.
-
Select the Update value section.
-
In the New value field, specify %adm-CustomAttributeText1%.
-
Click OK 2 times.
-
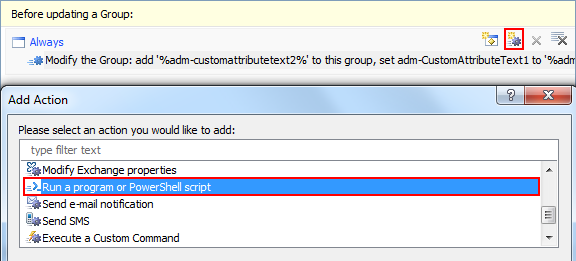
Also, you need to clear the custom attributes. To do this, you need to add another action. Click Add action.
-
Select the Run program or PowerShell script action.
-
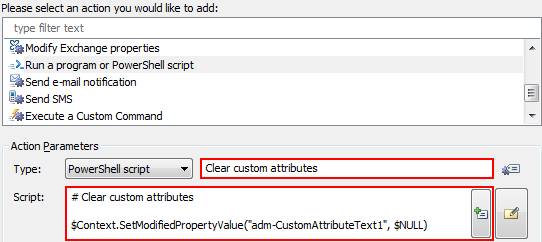
In the Script field enter the following script:
 # Clear custom attributes
 $Context.SetModifiedPropertyValue("adm-CustomAttributeText1", $NULL)
 $Context.SetModifiedPropertyValue("adm-CustomAttributeText2", $NULL)
-
Specify Short description. Click OK.
-
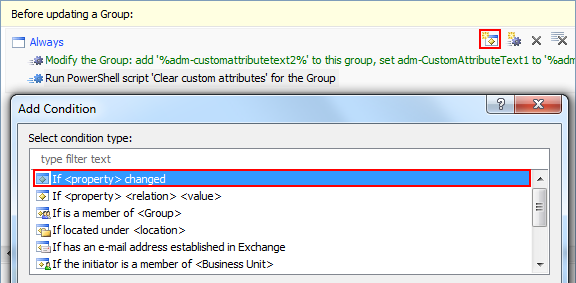
As mentioned above, the actions will be triggered only when a DN of a user is specified via CustomAttributeText2. For this purpose, yo need to add a condition. Click Add Condition.
-
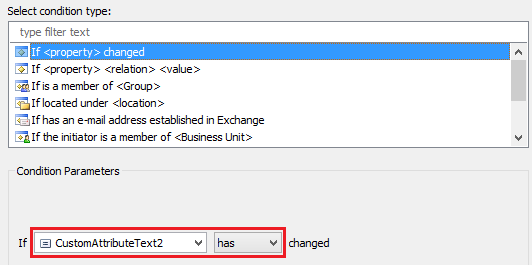
Select the If has changed condition type.
-
Specify If CustomAttributeText2 has changed.
-
Finish creating the Business Rule.
III. Specify custom names for attributes
You can specify your own names that will be used to display the virtual attributes for group objects. For information on how to specify a default name for all object types, see Customizing Display Names for AD Properties. To define display names that will be used only for groups, you need to do the following:
- Add the specificFriendlyName element to the corresponding XML friendlyNameItem.
- Specify group in the objectClass parameter of the specificFriendlyName attribute.
- Specify a desired display name as the value of the specificFriendlyName element.
In the following example, attribute CustomAttributeText1 will be displayed as Reason for groups and CustomAttributeText1 for all other object types:
<i class="text-italic"><friendlyNameItem>
    <ldapName>adm-CustomAttributeText1</ldapName>
    <friendlyName>CustomAttributeText1</friendlyName>
    <specificFriendlyName objectClass="<strong class="text-bold">group</strong>">Reason</specificFriendlyName>
  </friendlyNameItem></i>
To apply the changes, restart your IIS and Adaxes service.