Hello,
It is possible to do as you've described with Adaxes. First of all, you need to impose constraints on the Adaxes virtual property that will be used for selecting the email domain with a Property Pattern and specify a list of available domains. Then, you can create a Business Rule that will be executed after creating a user and that will set the Email property of the newly created user to the value generated from the user's first name, last name and the chosen email domain. Also, you can add the property that you chose to pass the email domain to the Web Interface form used for user creation so that it would be possible to select the email domain when creating a user. Finally, you can customize the display name for the Adaxes virtual property that you've chosen and give it your own name. To do this:
I. Impose constraints on the Adaxes virtual property.
For this purpose you can modify the built-in User Pattern:
- In the Console Tree, expand the service node that represents your Adaxes service.
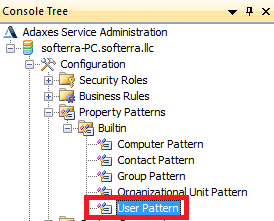
- Navigate to Configuration -> Property Patterns -> Builtin and select the User Pattern.
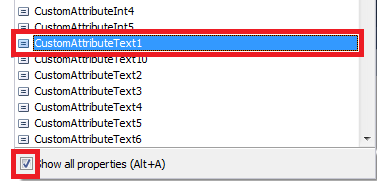
- Click Add... at the top of the Result Pane (located on the right), and select Show all properties.
- Select the virtual property on which you want to impose constraints.
- In the dialog box that appears, you can impose various constraints on the property. For an example on how to specify a list of predefined values to select from a drop-down list, see step 5 of the Specify List of Departments to Avoid Repetitive Typing Tutorial.
- When finished, save the modified Property Pattern.
II. Create a Business Rule that will update the Email property.
To create a Business Rule that will update the Email property:
-
Create a new Business Rule.
-
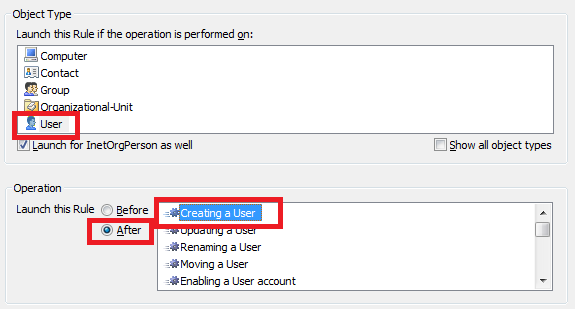
On the 2nd step of the Create Business Rule wizard, select User and After Creating a User.
-
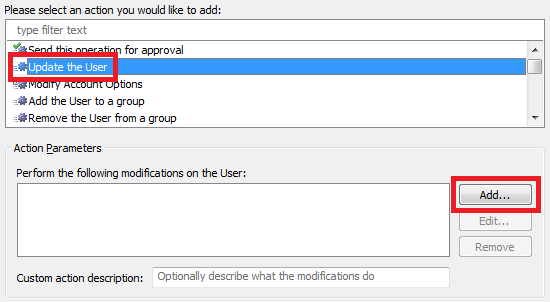
On the 3rd step, add the Update the User action and click Add.
-
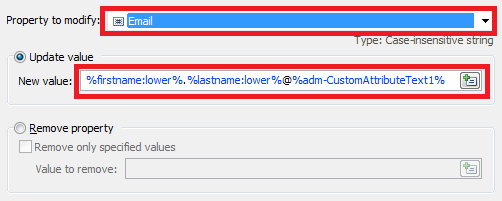
In the dialog box that appears, select the Email property in the Property to modify drop-down list.
-
Type the template for email generation in the New value field. For example, if you chose the CustomAttributeText1 property to pass the email domain, the template will be %firstname:lower%.%lastname:lower%@%adm-CustomAttributeText1%.
%firstname:lower%, %lastname:lower% and %adm-CustomAttributeText1% are value references that will be replaced with the values of the First Name (lowercased), Last Name (lowercased), and CustomAttributeText1 properties of the user when the Business Rule will be executed. For more information on value references, see Value Reference Format.
-
Click OK.
-
Click Add again.
-
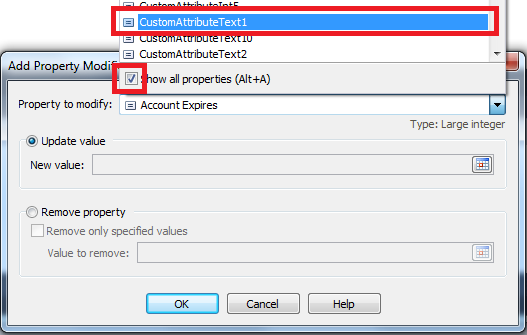
In the dialog box that appears, expand the Property to modify drop-down list and select Show all properties.
-
Select the virtual property that you chose to pass the email domain.
-
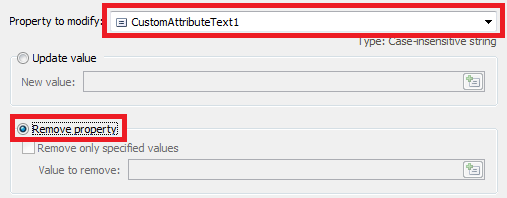
Switch the radio button to Remove property.
-
Click OK. This will remove the property after the Business Rule is executed as we no longer need it.
-
Click the Add Condition button.

-
Select the If condition.
-
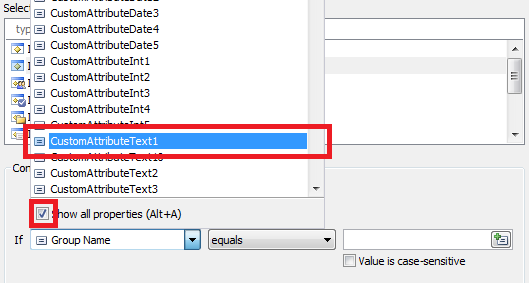
Expand the drop-down list and select Show all properties.
-
Select the virtual property that you chose to pass the email domain.
-
Select is not empty.
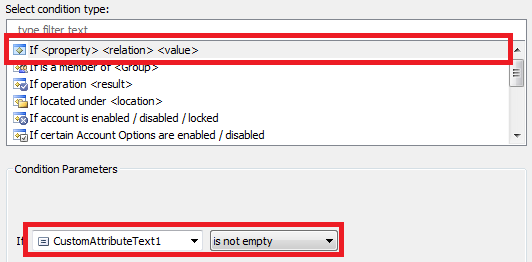
-
Click OK and finish creation of the Business Rule.
III. Customize Web Interface form for user creation.
To customize the Web Interface form used for user creation:
- On the computer, where your Web Interface is installed, start the Web Interface Customization tool.
- Select the Web Interface that you want to configure in the Interface type drop-down list.
- Activate the AD Management tab and click Customize Forms and Views.

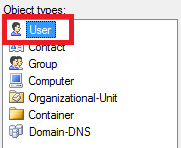
- In the Object types list (located on the left), select the User object type.
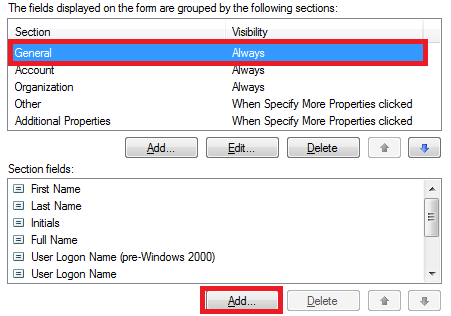
- Activate the Create tab.
- Select the section that you would like to add the property to in the list above.
- Click the Add button located under the Section fields list.
- In the dialog box that appears, select the Show all properties option and select the virtual property that you chose to pass the email domain.
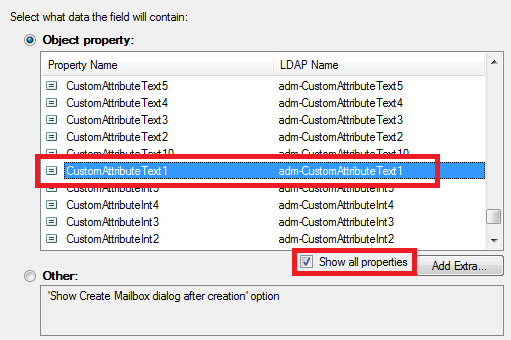
- Click OK 3 times.
IV. Customize the display name for the property.
As a name like CustomAttributeText1 will not tell much to your user about the meaning of the field, you want to give it your own name. See Customizing Display Names for AD Properties on how to accomplish this task.