Hello,
There is a small difficulty with creating shared mailboxes in Office 365, because you cannot actually 'create' it. You need to create a regular user mailbox first, and then convert it to shared type. Another issue is that creation of user mailboxes in Office 365 is not immediate. Sometiones, it can take several minutes.
Thus, to create an Office 365 shared mailbox, we suggest the following:
i. Home Page Action
You need to create an action on the Web Interface home page that will create a regular user account in your AD. The account will contain a certain flag that indicates that an online shared mailbox needs to be created.
ii. Business Rule
You need to create a Business Rule triggered after creating a new user. If the online shared mailbox flag is set, it will create a new user in Office 365 and assign them a license with Exchange Online so that a regular user mailbox is created.
iii. Scheduled Task
You need to create a Scheduled Task that will convert a user mailbox in Office 365 to shared type povided that the mailbox has already been created and the online shared mailbox flag is set, ALso, it will remove the flag so as to avoid an attempt to convert the same mailbox again.
As a flag, you can use one of Adaxes virtual properties, for example, CustomAttributeBoolean1 and set it to True. Adaxes virtual properties are not stored in Active Directory, but you can use them the same as any other property of directory objects.
To implement our sugestion:
i. Home Page Action
For information on how to create a Home Page Action described above, see section Create New Object in the Configure Home Page Actions tutorial.
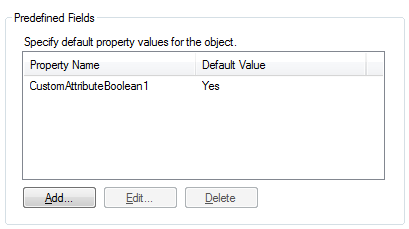
To automatically set the CustomAttributeBoolean1 property to True, you need to add a predefined field for the property. For information on how to add it, see Step 4 of the Create New Object section.
ii. Business Rule
To create a Business Rule that will create an account in Office 365 and assign an Exchange Online license:
- Create a new Business Rule.
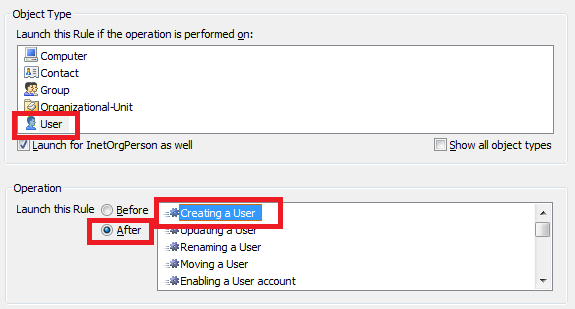
- On the 2nd step of the Create Business Rule Wizard, select User and After Creating a User.
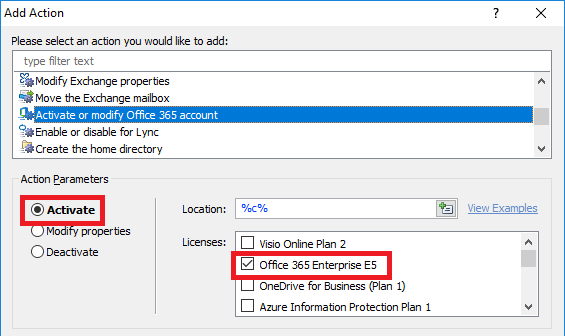
- On the 3rd step, add the Activate or modify Office 365 account action.
- Select Activate.
- Enable a license with access to the Exchange Online service. For example, that can be opne of the Enterprise E licenses.
- Click OK.
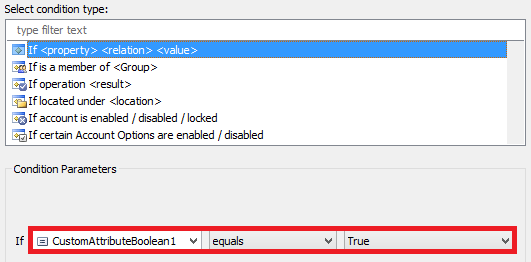
- Now, you need to add a condition when the script will be executed. Right-click the action that you've just added and select Add Condition.
- Select the If condition type.
- In the drop-down list, select Show all properties and select the virtual property that you chose as a trigger for shared maiolbox creation, e.g. CustomAttributeBoolean1.
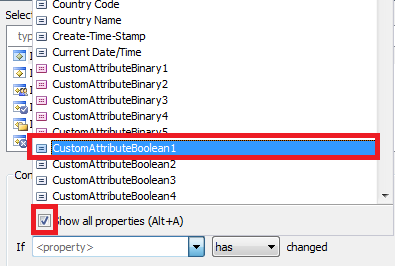
- Select equals and True.
- Click OK.
- Finish creation of the Business Rule.
iii. Scheduled Task
To create a Scheduled Task that converts mailboxes to shared type:
- Create a new Scheduled Task.
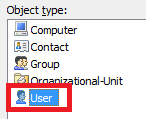
- On the 3rd step of the Create Scheduled Task Wizard, select User.
- On the 4th step, add the Run a program or PowerShell script action.
- Add the following scripot from our Script Repository: http://www.adaxes.com/script-repository ... e-s160.htm.
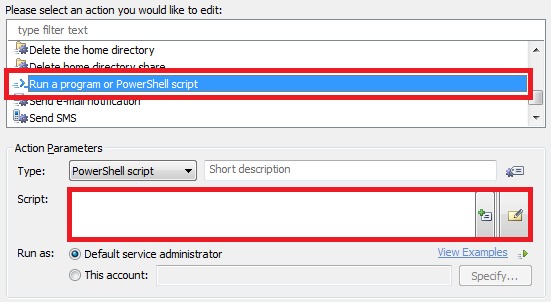
- Enter a short dscription and click OK.
- Now, you need to redeem the license assigned to the user. Right-click the action and click Add New Action.
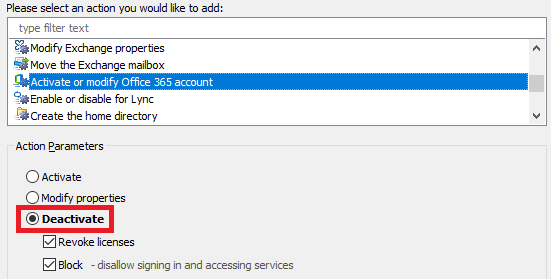
- Select the Activate or modify Office 365 account action.
- Select Deactivate and click OK.
- Now, you need to remove the flag. Right-click the action and click Add New Action.
- Select the Update the User action and click Add.
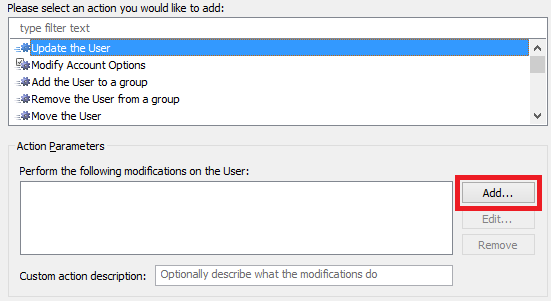
- In the Property to modify drop-down list, select the virtual property that you chose as a trigger for shared maiolbox creation, e.g. CustomAttributeBoolean1.
- Select Remove property.
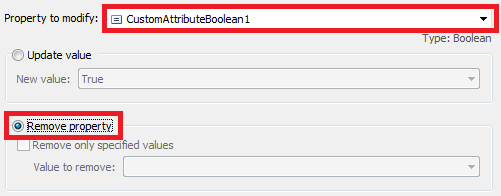
- Click OK 2 times.
- Now, you need to add a condition when actions will be executed. Double-click Always.
- Select the If condition type.
- In the drop-down list, select Show all properties and select the virtual property that you chose as a trigger for shared maiolbox creation, e.g. CustomAttributeBoolean1.
- Select equals and True.

- Click OK. You should receive something like this:

- Finish creation of the Scheduled Task.