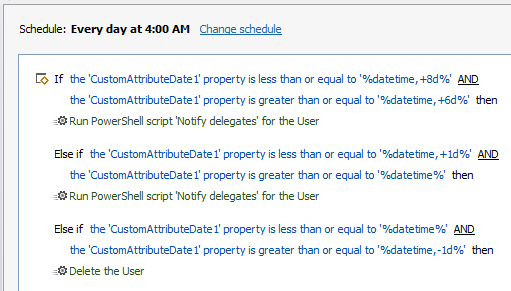
Thank you for the provided details. The solution will include an Action, a Business Rule triggering After Updating a User and a Scheduled Task. The action will be used to disable a user, specify additional recipients and set the date when the user will be deleted. For the recipients you will need to use the See Also property. The date for user deletion will be stored in an Adaxes custom date attribute (e.g. CustomAttributeDate1). The action form will contain only the See Also property, disabling and setting the deletion date will be done automatically. The Business Rule will trigger after the action is executed and notify the recipients that the account is disabled and they were granted full access to their mailbox and OneDrive. The Scheduled Task will notify the recipients 1 week, then 1 day before deleting the user and finally delete the user on the date specified in CustomAttributeDate1.
-
Launch Adaxes Administration Console.
-
In the Console Tree, right-click your service node.
-
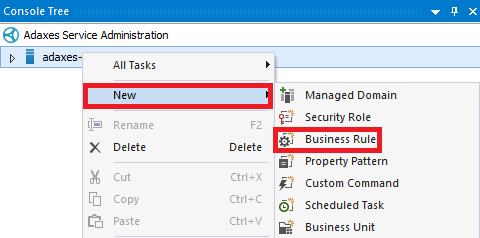
In the context menu, navigate to New and click Business Rule.
-
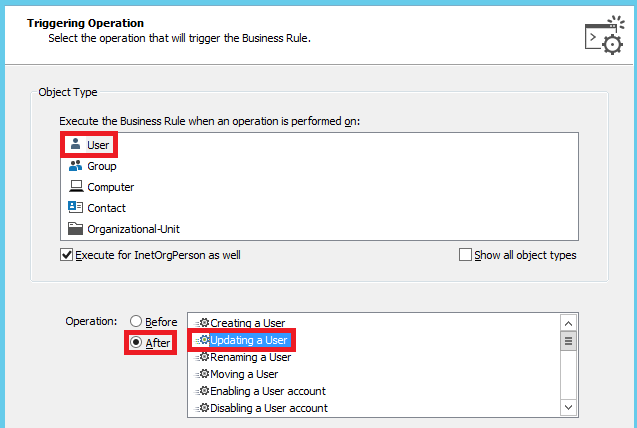
On step 2 of the Create Business Rule wizard, select User Object type.
-
Select After Updating a User and click Next.
-
Click Add an action.
-
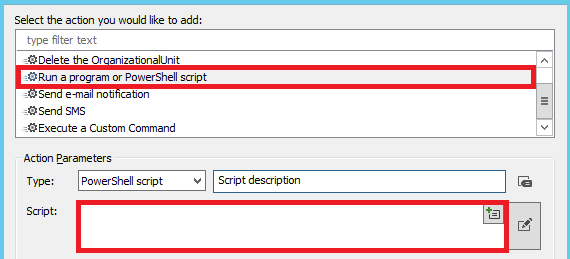
Select Run a program or PowerShell script.
-
Paste the below script into the Script field.
In the script:
- $attributeName - Specifies the LDAP name of the property used to store additional recipients (e.g. seeAlso);
- $message - Specifies the message text;
- $subject - Specifies the message subject;
- $adminWebApplicationURL - Specifies the SharePoint URL.
 $attributeName = "seeAlso" # TODO: modify me
 $message = "My Message" # TODO: modify me
 $subject = "My Subject" # TODO: modify me

 $adminWebApplicationURL = "https://Company-admin.sharepoint.com" # TODO: modify me

 $userDNs = @()
 try
 {
     $managerDN = $Context.TargetObject.Get("manager")
     $userDNs += $managerDN
 }
 catch
 {
     $Context.LogMessage("The user %fullname% has no manager.", "Warning")
 }

 try
 {
     $values = $Context.TargetObject.GetEx($attributeName)
     $values | %%{$userDNs += $_}
 }
 catch
 {
     $Context.LogMessage("Aditional delegates are not specified.", "Warning")
 }

 if ($userDNs.Length -eq 0)
 {
     return
 }

 $adminClientContext = New-Object Microsoft.SharePoint.Client.ClientContext($adminWebApplicationURL)
 $office365Cred = $Context.GetOffice365Credential()
 $credentials = New-Object Microsoft.SharePoint.Client.SharePointOnlineCredentials($office365Cred.Username, (ConvertTo-SecureString $office365Cred.GetNetworkCredential().Password -AsPlainText -Force))
 $adminClientContext.Credentials = $credentials

 # Get user
 $adminWeb = $adminClientContext.Web
 $user = $adminWeb.EnsureUser("%userPrincipalName%")
 $adminClientContext.Load($user)
 try
 {
     $adminClientContext.ExecuteQuery()
 }
 catch
 {
     Write-Error "An error occurred when searching for the user in SharePoint. Error: $($_.Exception.Message)"
     return
 }

 # Get user profile
 $peopleManager = New-Object Microsoft.SharePoint.Client.UserProfiles.PeopleManager($adminClientContext)
 $userProfile = $peopleManager.GetPropertiesFor($user.LoginName)
 $adminClientContext.Load($userProfile)
 $adminClientContext.ExecuteQuery()

 Connect-SPOService -Url $adminWebApplicationURL -Credential $office365Cred

 # Add permissions
 foreach ($dn in $userDNs)
 {
     $user = $Context.BindToObjectByDN($dn)
     $userName = $user.Get("userPrincipalName")
     $address = $user.Get("mail")

     try
     {
         Set-SPOUser -Site $userProfile.PersonalUrl -LoginName $userName -IsSiteCollectionAdmin $True -ErrorAction Stop
         $Context.SendMail($address, $subject, $message, $NULL)
     }
     catch
     {
         $Context.LogMessage("An error occured when adding permission for $userName. Error: " + $_.Excpetion.Message, "Warning")
     }
 }
-
Enter a short description and click OK.
-
Right-click the action you created and click Add Condition in the context menu.
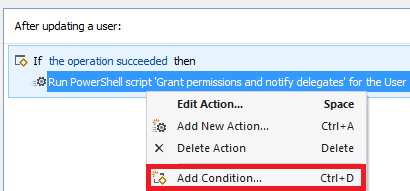
-
Select If changed.
-
Select If See Also has changed and click OK.
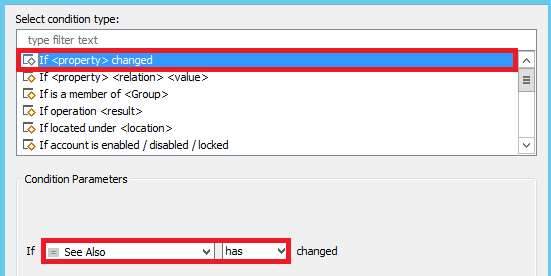
-
Repeat steps 10 and 12 for CustomAttributeDate1 and Account Options.
-
Right-click the action you created and click Add Condition in the context menu again.
-
Select If .
-
Select If CustomAttributeDate1 is not empty and click OK.
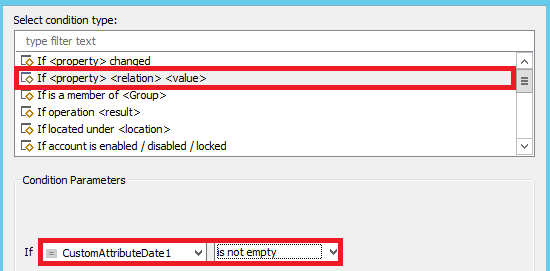
-
Right-click the action you created and click Add Condition in the context menu again.
-
Select If account enabled / disabled / locked.
-
Select disabled and click OK.
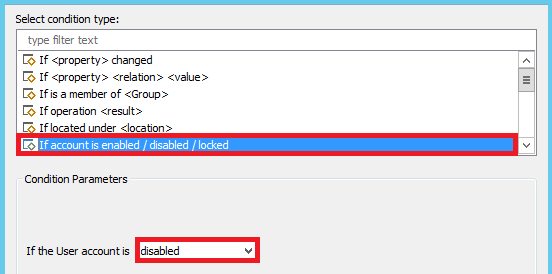
-
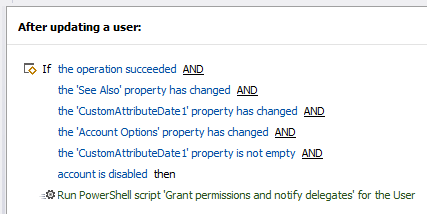
Click Next and finish creating the Business Rule. You should have something like the following:
-
Launch Adaxes Administration Console.
-
In the Console Tree, right-click your service node.
-
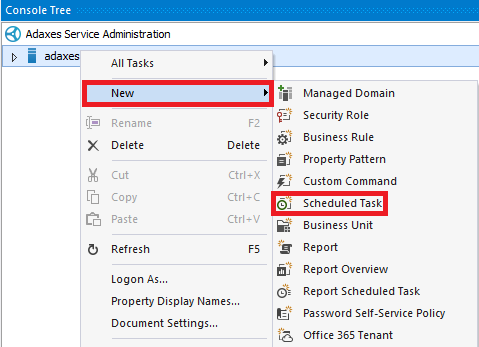
In the context menu, navigate to New and click Scheduled Task.
-
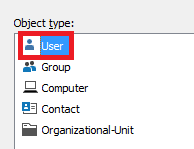
On step 3 of the Create Scheduled Task wizard, select User Object type and click Next.
-
Click Add an action.
-
Select Run a program or PowerShell script.
-
Paste the below script into the Script field.
In the script:
- $attributeName - Specifies the LDAP name of the property used to store additional recipients (e.g. seeAlso);
- $message - Specifies the message text;
- $subject - Specifies the message subject.
 $attributeName = "seeAlso" # TODO: modify me
 $message = "My Message" # TODO: modify me
 $subject = "My Subject" # TODO: modify me

 $userDNs = @()
 try
 {
     $managerDN = $Context.TargetObject.Get("manager")
     $userDNs += $managerDN
 }
 catch
 {
     $Context.LogMessage("Manager not specified.", "Warning")
 }

 try
 {
     $values = $Context.TargetObject.GetEx($attributeName)
     $values | %%{$userDNs += $_}
 }
 catch
 {
     $Context.LogMessage("Attribute $attributeName is empty.", "Warning")
 }

 if ($userDNs.Length -eq 0)
 {
     return
 }

 foreach ($dn in $userDNs)
 {
     $user = $Context.BindToObjectByDN($dn)
     $address = $user.Get("mail")

     $Context.SendMail($address, $subject, $message, $NULL)
 }
-
Enter a short description and click OK.
-
Double-click Always.
-
Select If .
-
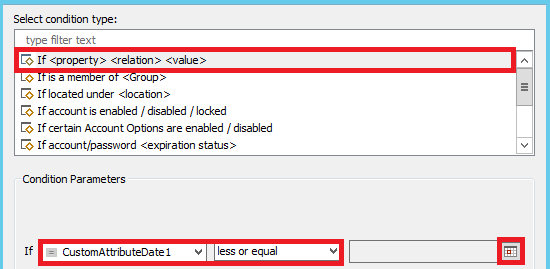
Select If CustomAttributeDate1 less or equal and click Edit.
-
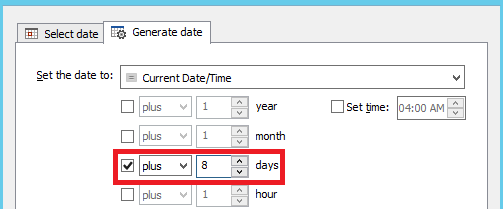
Select plus 8 days and click OK twice.
-
Right-click the condition you created and click Add New Condition in the context menu.
-
Select If .
-
Select If CustomAttributeDate1 greater or equal and click Edit.
-
Select plus 6 days and click OK twice.
-
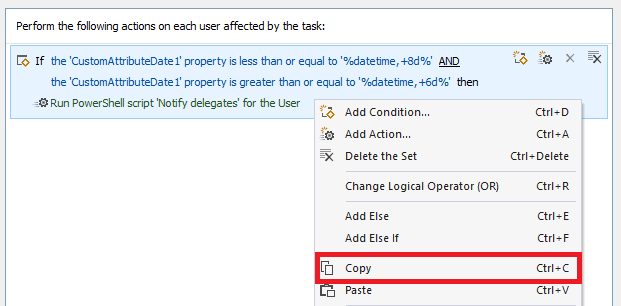
Right-click the set of action and conditions you created and click Copy in the context menu.
-
Press Ctrl+V.
-
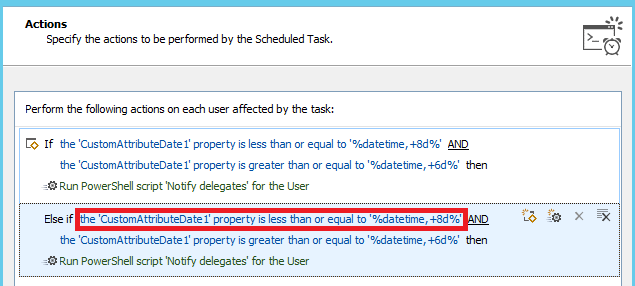
In the Else if block, double-click the If CustomAttributeDate1 less or equal condition.
-
Click Edit in the value field.
-
Select plus 1 day and click OK twice.
-
In the Else if block, double-click the If CustomAttributeDate1 greater or equal condition.
-
Click Edit in the value field.
-
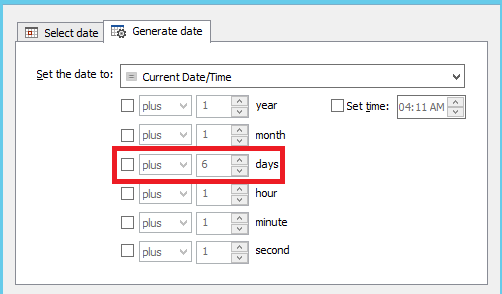
Clear the plus checkbox and click OK twice.
-
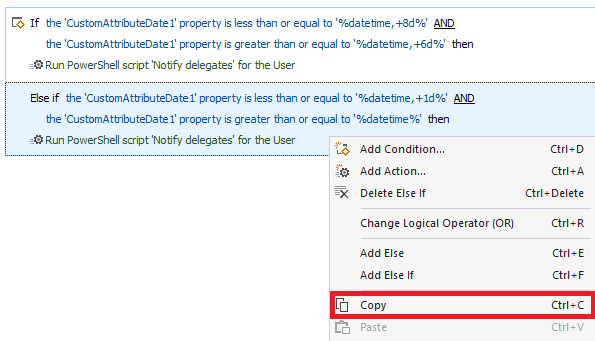
Right-click the Else if block you created and click Copy in the context menu.
-
Press Ctrl+V.
-
In the new Else if block, double-click the If CustomAttributeDate1 less or equal condition.
-
Click Edit in the value field.
-
Clear the plus checkbox and click OK twice.
-
In the new Else if block, double-click the If CustomAttributeDate1 greater or equal condition.
-
Click Edit in the value field.
-
Select minus 1 day and click OK twice.
-
Double-click the Run script action in the new Else if block.
-
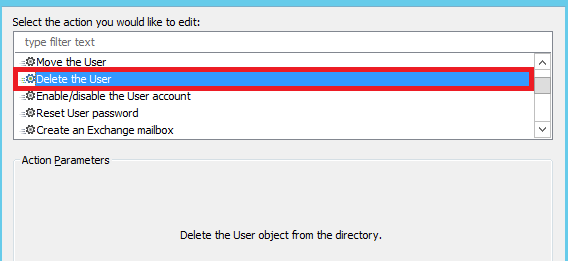
Select Delete the user and click OK.
-
Click Next and finish creating the Scheduled Task. You should have something like the following:
